Make a Sale (Checkout Flow)
Heksia POS is designed to make the checkout process fast, simple, and reliable.
Below is the full step-by-step flow for creating a sale.
1. Open the POS screen
Navigate to Point of sale from the sidebar menu.
You will see:
- Product catalog
- Search bar
- Buttons for custom sale, adding customers, and opening the cash drawer
- Receipt panel on the right
2. Add items to the receipt
There are three ways to add products:
Option A — Tap a product
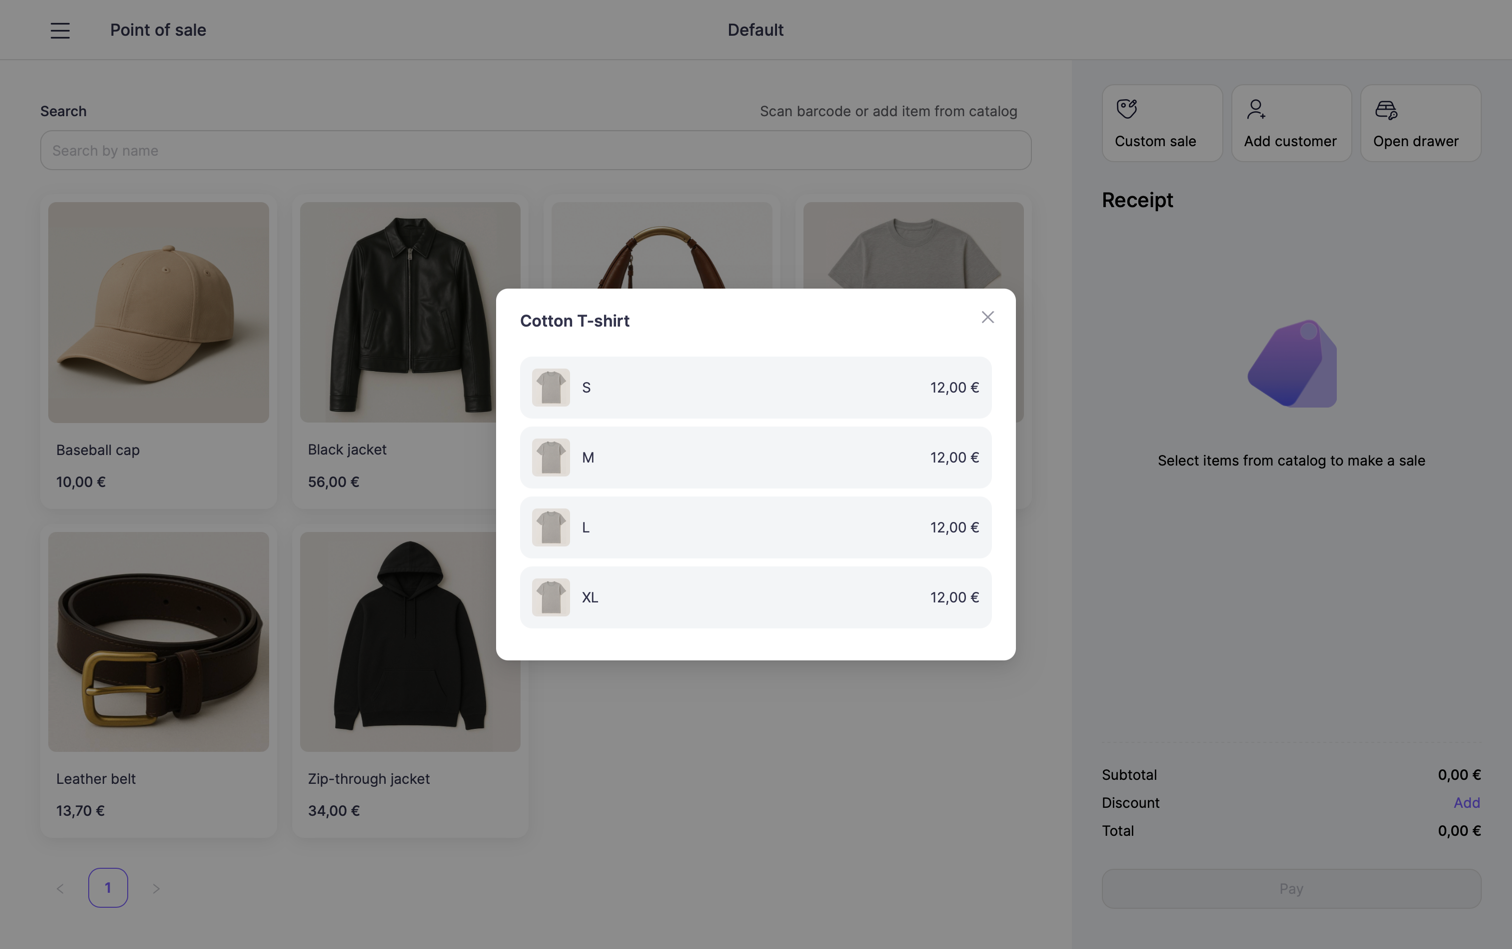
Tap any product or variant card in the catalog to add it to the receipt.
- If the product has only one variant, it is added immediately.
- If the product has multiple variants, a modal window will open where you can select the specific variant (size, color, etc.).
Option B — Scan a barcode
If your product has a barcode, simply scan it with your barcode scanner.
The POS app will detect the scan automatically and immediately add the product to the receipt.
Option C — Custom sale
Tap Custom sale if you want to sell an item that:
- Does not exist in your catalog
- Has a temporary or manual price
- Is a one-off product or service
You will be prompted to enter:
- Name — the name of the custom item
- Amount — price per unit
- Tax — optional (you may leave it empty if the item is not taxable)
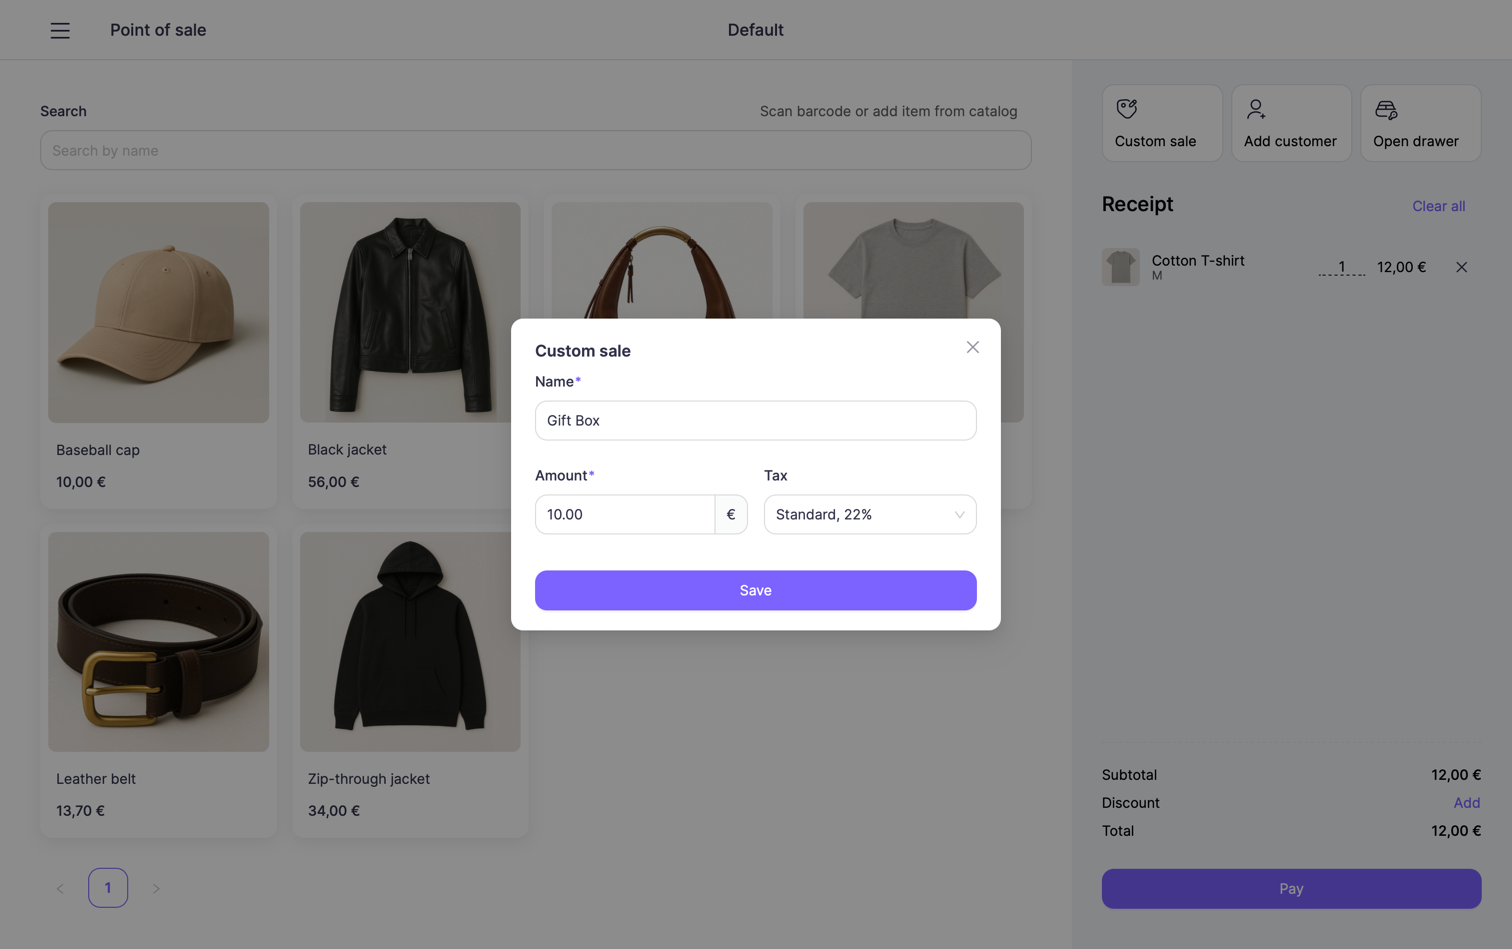
After filling in the fields, tap Save, and the custom item will be added to the receipt.
3. Adjust items in the receipt
You can manage items in the receipt in several ways:
Remove an item
To remove a product from the receipt, simply tap the ✕ (remove) icon next to the item.
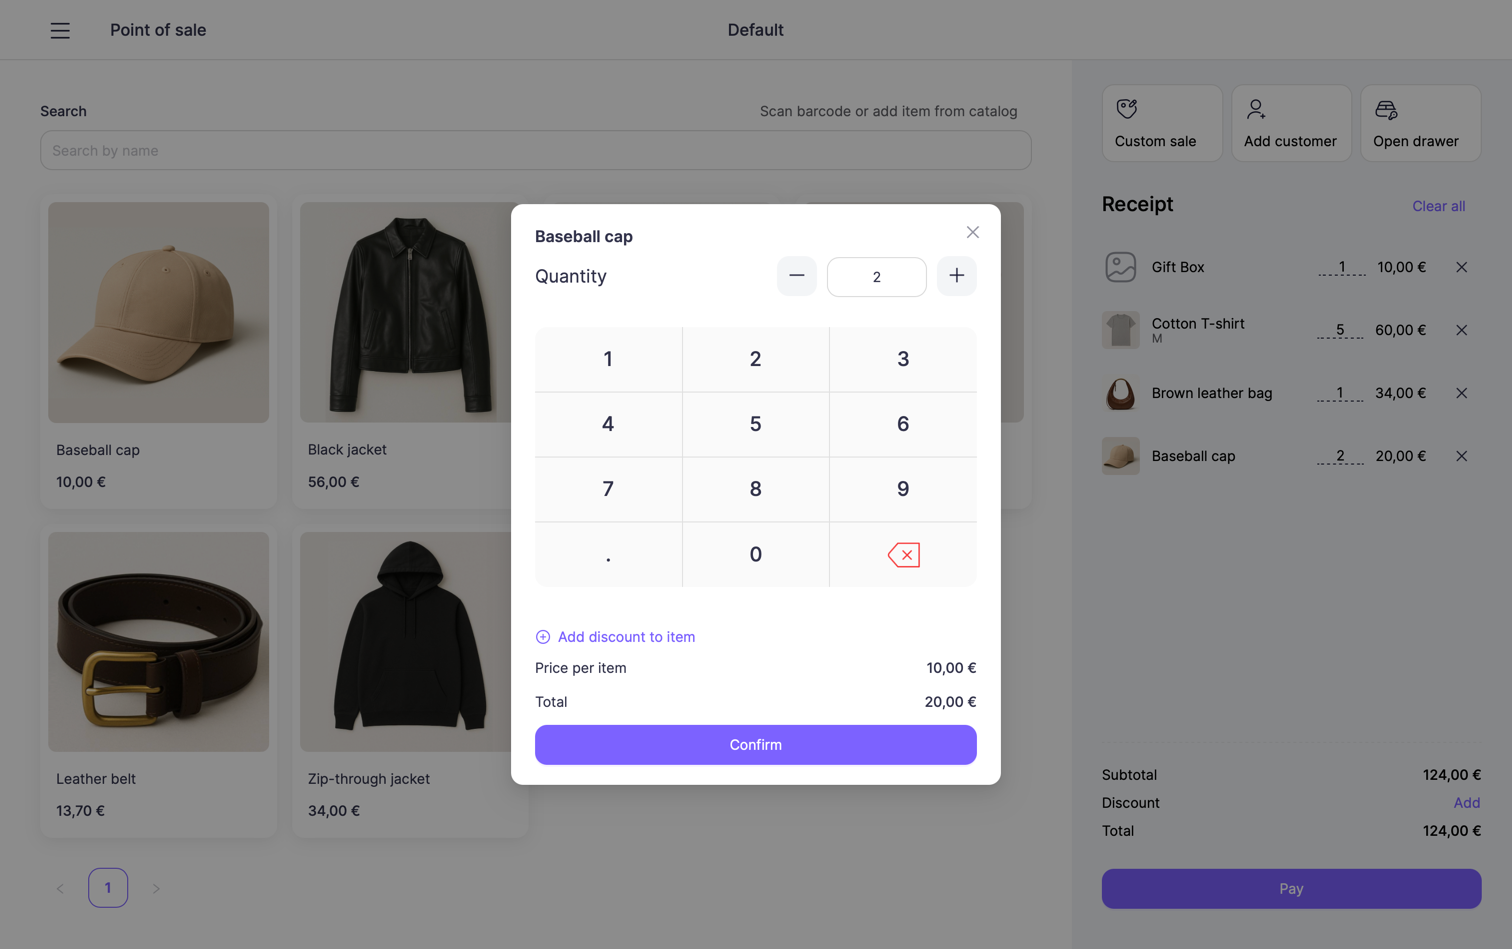
Change quantity
To change the quantity of an existing item:
- Tap on the item in the receipt
- A quantity modal will open
- Use the keypad or + / – buttons to adjust the quantity
- Tap Confirm to save changes
Add more of the same item
You can also increase the quantity by tapping the same item again in the catalog, every tap adds +1 to the quantity in the receipt.
4. Apply a discount
Heksia POS allows you to apply discounts either to a specific item or to the entire receipt.
A. Discount on a specific product
To add a discount to a single item:
- Tap the product in the receipt.
- In the item modal, tap Add discount to item.
- Choose:
- Discount type:
- Percentage (%) — e.g., 10% off
- Fixed amount (€) — e.g., €5 off
- Discount value
- Optional: Discount name (e.g., Best client)
- Discount type:
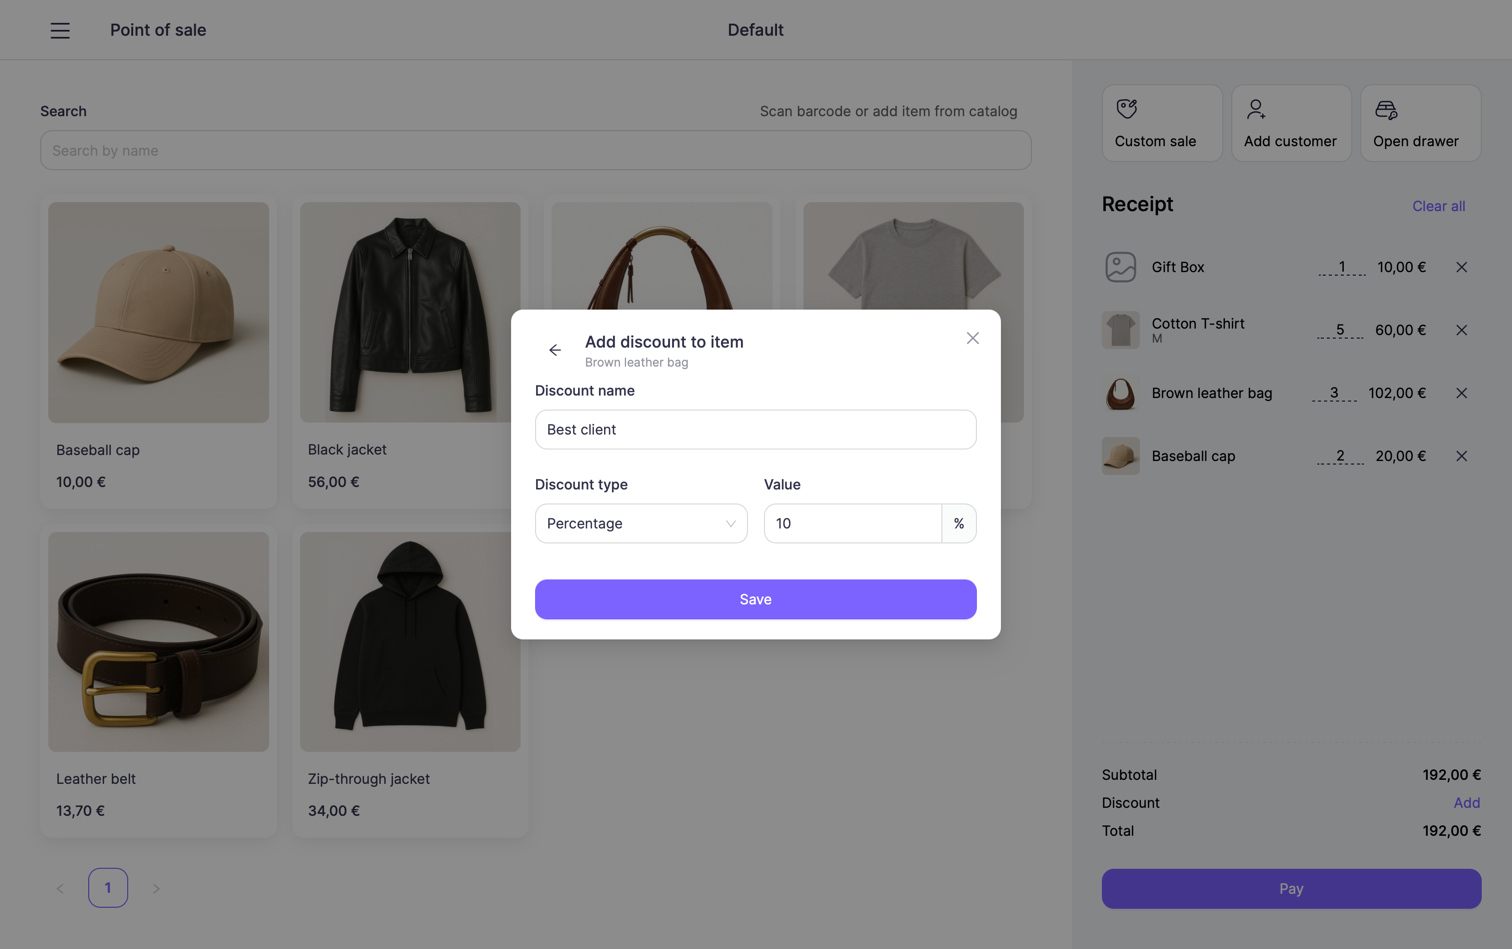
The discounted price will be shown directly in the receipt — original price will be crossed out.
B. Discount on the entire receipt
To apply a discount to the whole order:
- In the receipt panel, tap Add next to Discount.
- Enter:
- Discount type (percentage or fixed amount)
- Discount value
- Optional reason
Receipt-level discounts apply to the subtotal before tax.

Both types of discounts can be combined, for example, discounted individual items plus an end-of-order discount.
5. Add a customer
If needed, you can assign a customer to the sale:
- Tap Add customer
- In the modal window:
- Search for an existing customer by email, or phone number
- Or tap Add new customer and fill in their details
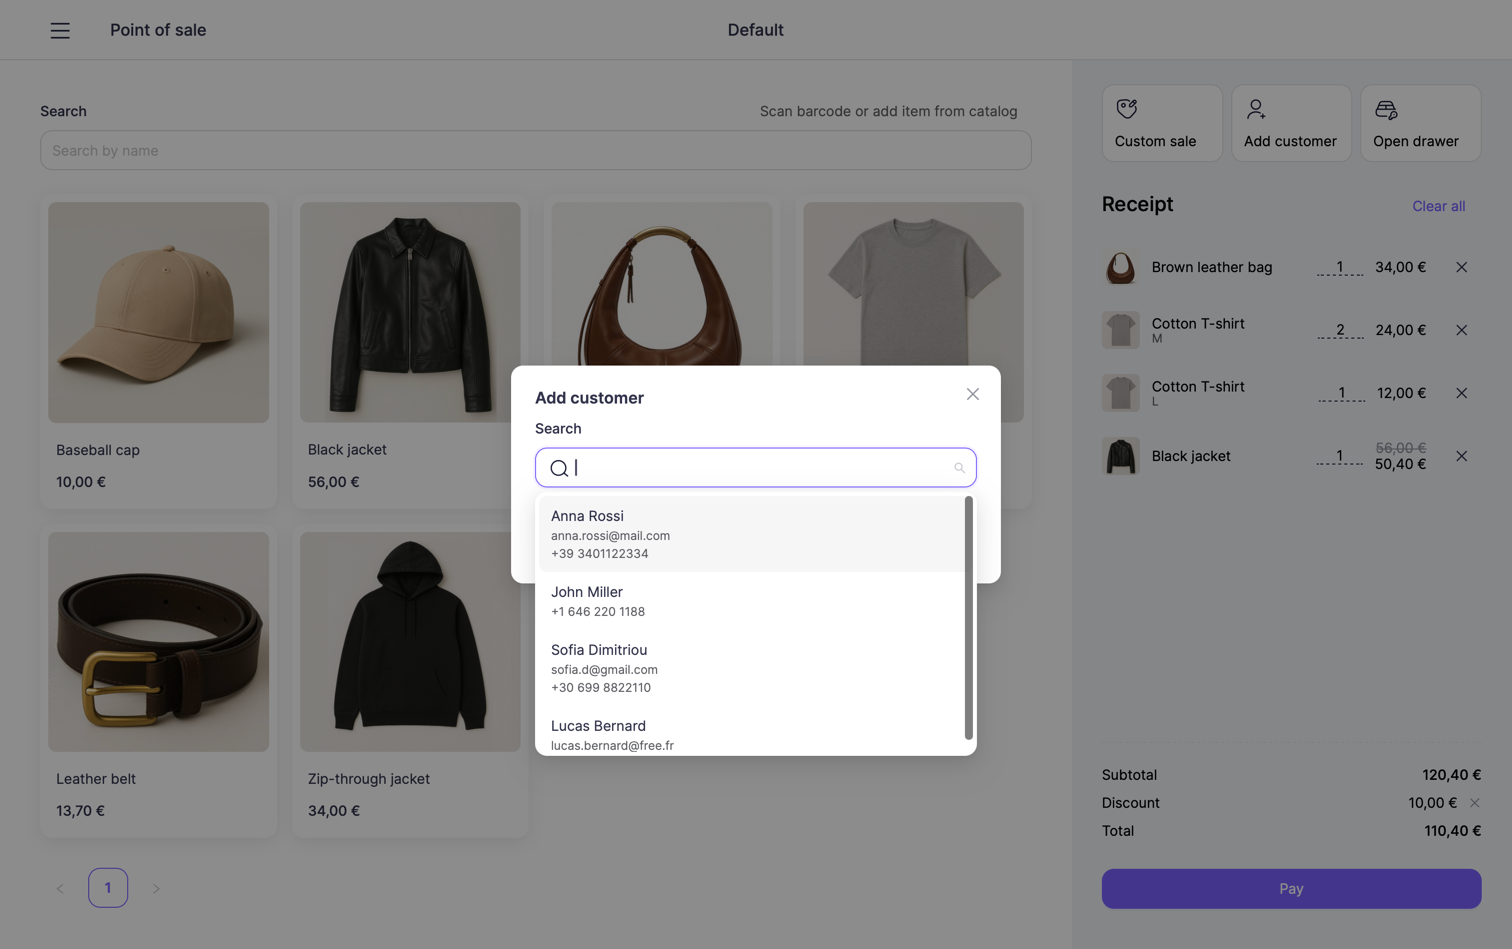
When a customer is attached, all transactions from this sale will be linked to their profile.
This allows you to see customer purchase history and total spent.
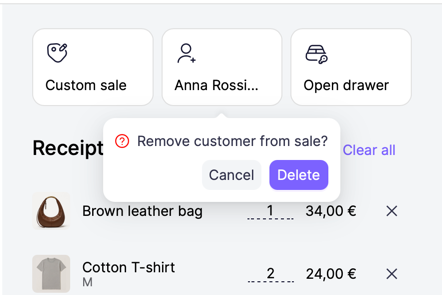
To remove a customer from the current sale, tap the customer button again and choose Delete in the confirmation dialog.
6. Checkout
When your receipt is ready, tap Pay to open the checkout screen.
On this screen you can review:
- Subtotal
- Tax
- Discounts
- Total amount to pay
Then choose how the customer wants to pay.
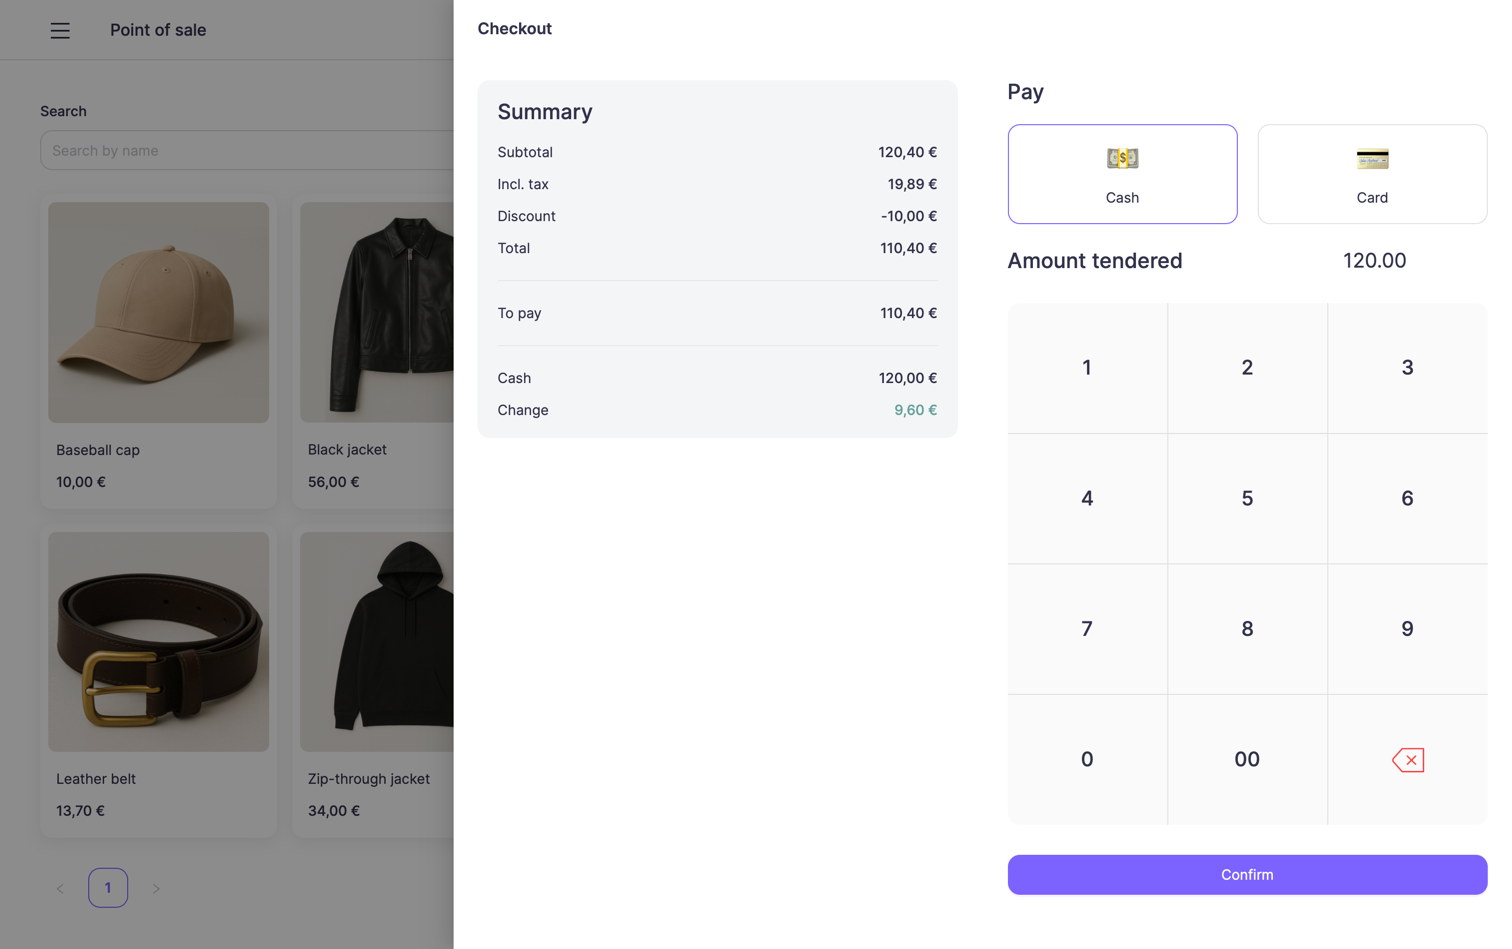
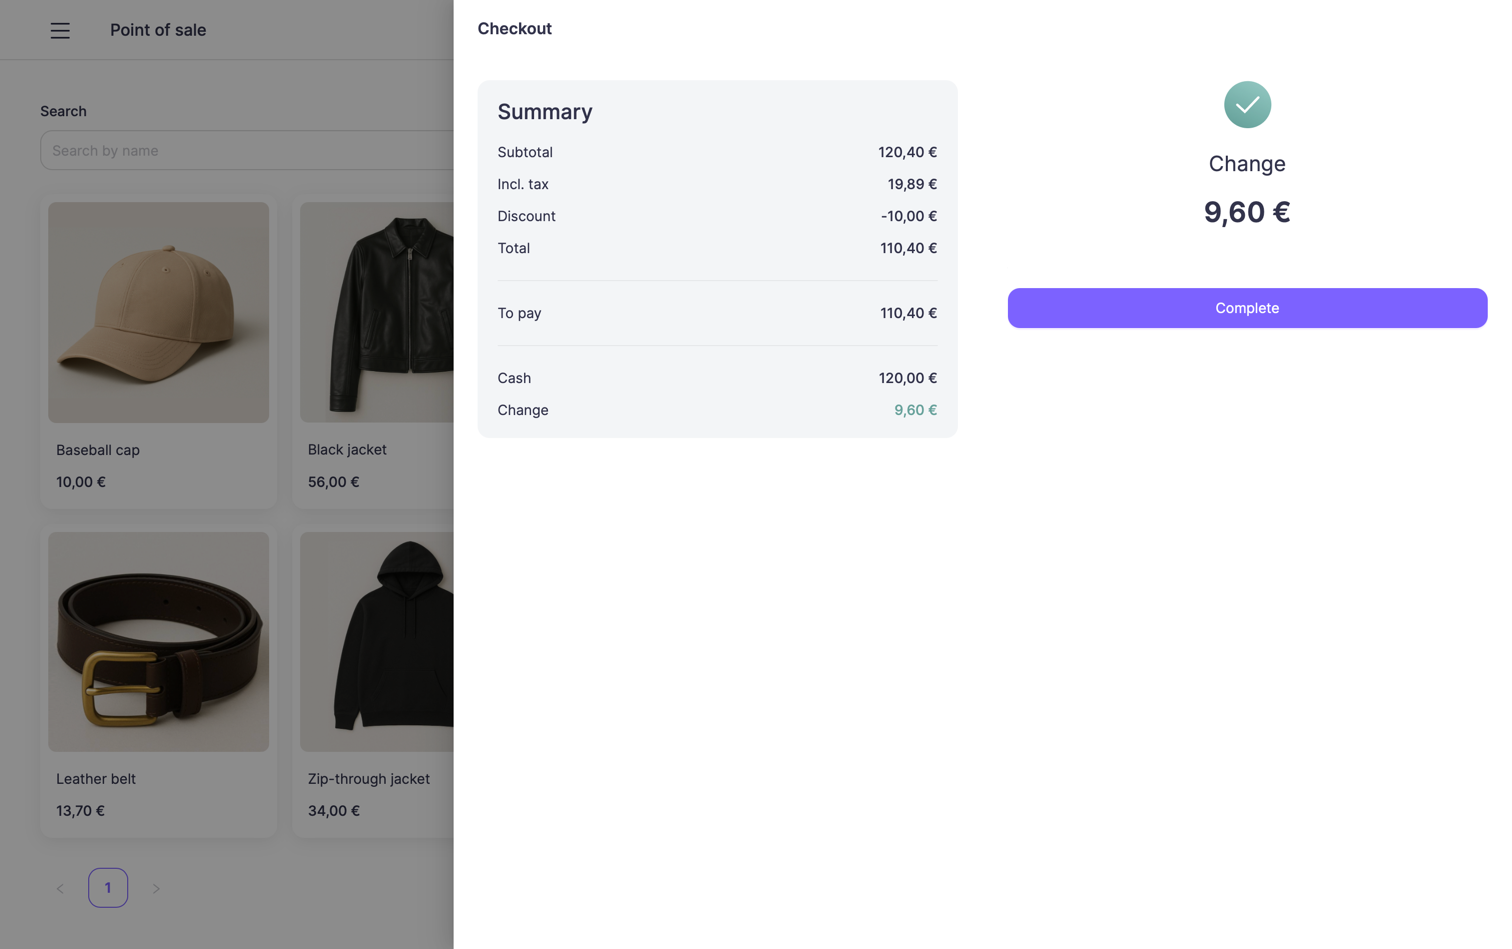
Cash payment
If the customer pays with cash:
- Select Cash.
- Enter the amount received using the on-screen keypad.
- The system will automatically calculate the change.
- Tap Confirm to complete the sale.
Use this option when you accept cash directly without using a payment terminal.
Card payment
If the customer pays by card, select Card.
If an Adyen terminal is connected
- The total amount is automatically sent to the terminal.
- The customer taps, inserts, or swipes their card.
- Once the terminal confirms the payment, the sale is completed automatically.
If no terminal is connected
- You will need to manually enter the payment amount on your physical card terminal
- After entering the amount, the customer completes the card transaction on the terminal
- Once the payment is processed, tap Confirm in the POS app to finalize the sale
Completing the sale
After the payment is processed:
- Tap Confirm to close the checkout screen.
- If a receipt printer is connected, the printed receipt will be generated automatically.
The sale is now completed and saved in your transaction history.
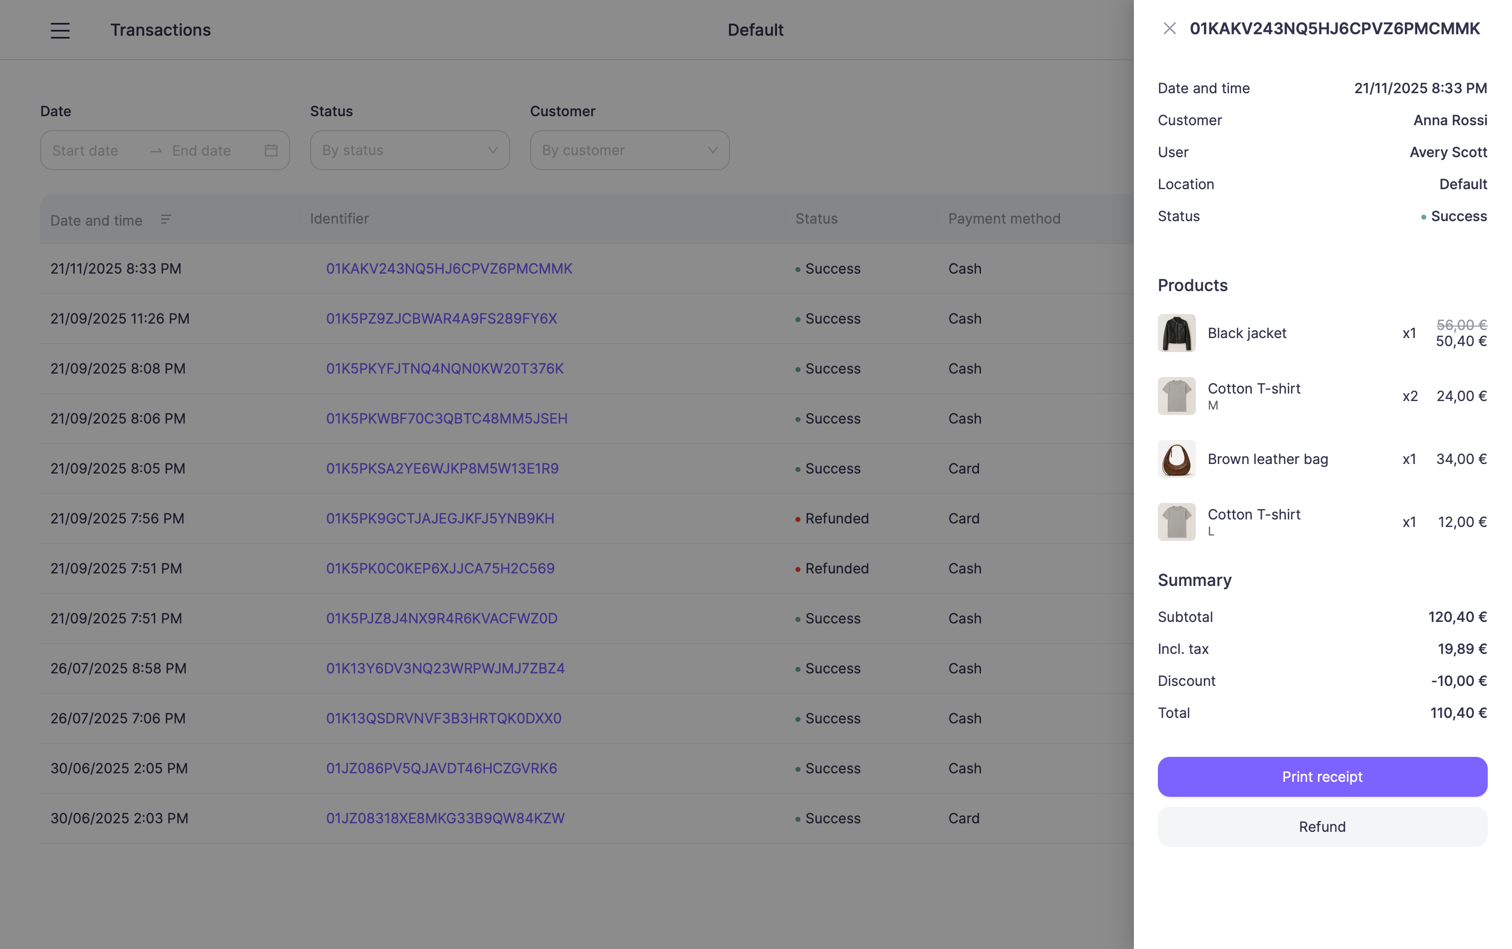
7. Sale completed
The sale is now complete.
You can view all completed and refunded transactions in the Transactions section for your current location.